The guitar bend is such a ubiquitous technique that you should learn it shortly after you first start playing. Otherwise, you’ll be limited to a small pool of songs – and you’ll miss out on a whole world of tone and style.
What Is a Guitar Bend?
A bend is when you push a string up or pull it down in order to raise the pitch.
Watch this Sweetpotato Slim video for some great examples of bends in blues:
Pay attention to when he shoves a string upwards, often bending the strings above it at the same time. This creates sound that some describe like crying or like a moo – moving from a lower pitch to a higher one. That’s a bend.
What’s the Point?
There are a lot of advantages to playing bends:
You can play pitches higher than normally possible for your guitar.
You can reach a higher pitch without repositioning your hand.
Most importantly, you achieve a unique sound when bending from one note to another, similar to a legato slide but free from the fluctuations caused by sliding over fret wires.
‘[Bends] let you play more notes faster while adding more variety to your sound’.
In other words, they let you play more notes faster while adding more variety to your sound – making them especially useful for playing guitar solos and writing your own songs.
Do I Need to Know Any Theory?
Ideally, you should understand guitar intervals and spend a little time on ear training before learning how to play bends. Here’s a crash course in the theory you need to get started:
Basic Intervals
You need to understand four intervals before learning bends: minor and major seconds, and minor and major thirds.
A minor second is also called a half-step or semitone. It’s the distance in sound between any two frets that are right next to each other. For example, the 8th fret is a minor second higher in pitch than the 7th fret.
A major second is also called a whole step or whole tone. It’s the distance in sound between one fret and another two frets away. The 9th fret is a major second higher in pitch than the 7th fret.
A minor third is the distance in sound between one fret and another three frets away. The 10th fret is a minor third higher in pitch than the 7th fret.
A major third is the distance in sound between one fret and another four frets away. The 11th fret is a major third higher in pitch than the 7th fret.
You should spend some time learning these different sounds if you really want to play bends well. However, if you don’t have the time or your ear just doesn’t feel like cooperating, I do have a bit of a shortcut that I will cover later.
Do I Need Any Special Equipment?
It’s much easier to play bends on electric guitars than acoustic guitars. However, if you have an acoustic guitar with light strings and a low action, that should work too.
How to Play Bends
Where to Start
The best place to start playing bends is probably the third (G) string. Why?
You have plenty of room on the neck to bend upwards.
You don’t have to bend as far as you do with the higher strings.
It’s sturdier than the higher strings. This can be a comfort to beginning guitarists, who often have a bit of a phobia about the strings snapping on them while playing their first bends.
It’s also a good idea to start toward the middle of the guitar, as the strings get easier to bend the further you go from the nut or the bridge. So we’re going to start with the 9th fret of the G string.
Finding Your Target Pitch
You don’t want to just bend the string. You want to bend until you hit a certain note – typically a minor or major second, but sometimes as much is a minor third, higher than the note you started playing.
‘You don’t want to just bend the string. You want to bend until you hit a certain note’.
Let’s start with playing a half bend, so called because you’re trying to reach a note that’s a half step (minor second) higher than the one you started on.
If you already have well-trained ears and understand intervals well, you can skip the rest of this section. For the rest of us, here’s some instant ear training for doing a half bend from the 9th fret:
Play the 9th fret. Pay close attention to the pitch.
Play the 10th fret. Really listen to the difference in sound. This is the pitch you’re going to want to hear when you bend up from the 9th fret.
Play the 11th fret. Try to remember this pitch too – if you hear this when playing your bend, you’ll have gone too far.
Play the 9th and 10th frets several more times, until you can hear the two different notes in your mind’s ear.
The Shortcut
Can’t hear the difference between notes well enough? Plug into a guitar tuner and follow the steps above, looking at the notes you get on the different frets. (You should see E on the 9th fret, F on the 10th and F# on the 11th in standard tuning.) When you perform your guitar bend, bend until your tuner shows the 10th-fret note (F).
‘Can’t hear the difference between notes well enough? Plug into a guitar tuner’.
Note that this is just a quick fix to help you get started. Use it as training wheels, not your long-term method of operation.
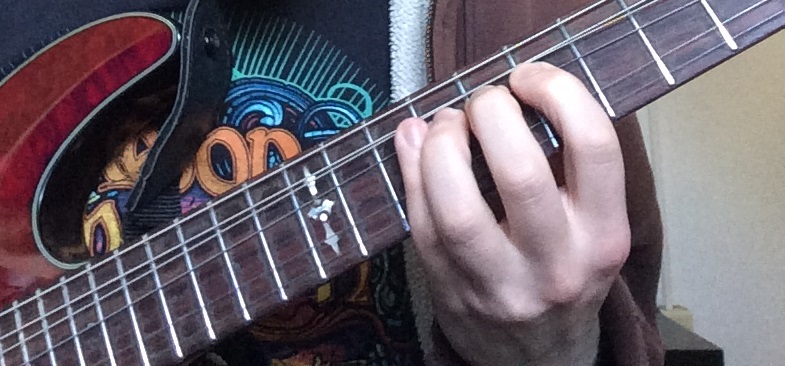
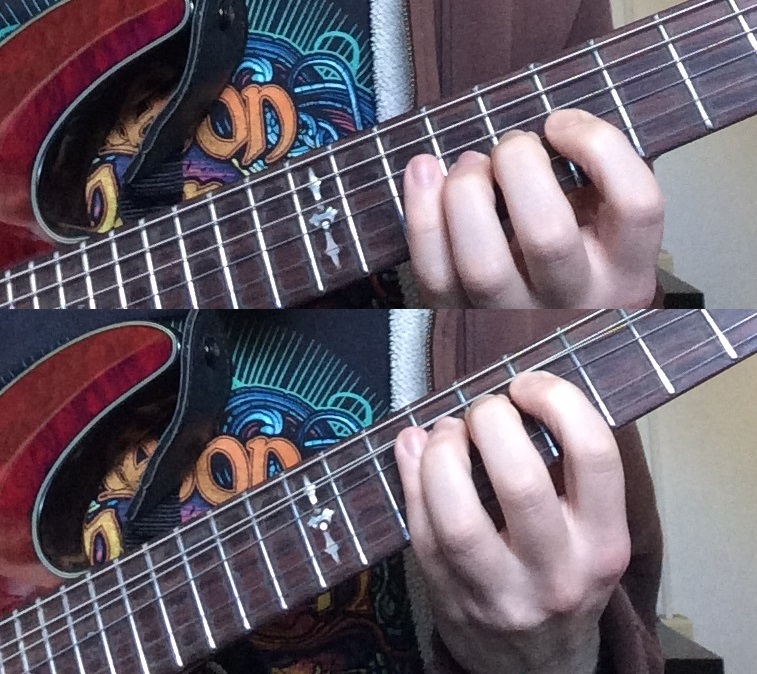
Finger Positioning
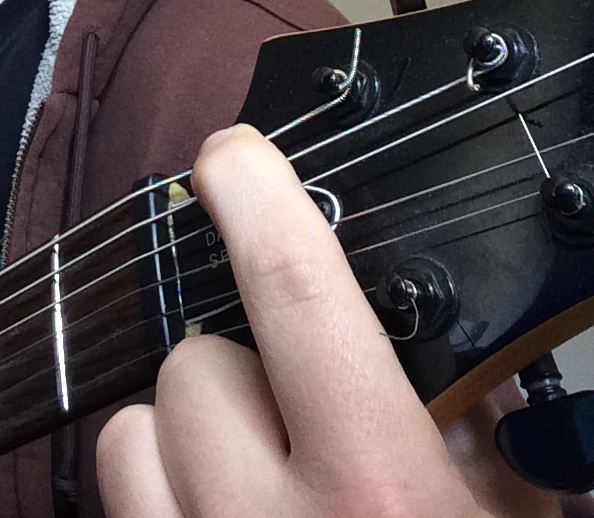
Now, you might be tempted to play with just your index finger to get started. Bending strings is a tough job, though. It’s a better idea to use two or even three fingers working together on one string.
Push down on the 9th fret of the G string with the tip of your ring finger. Then bring the tips of your middle and index fingers down on the same string behind it. There are two ways to do this:
1. Put one finger on each fret. This will put you in a good position to play other notes after this one.
2. Bunch your fingers together to make them as strong as possible.
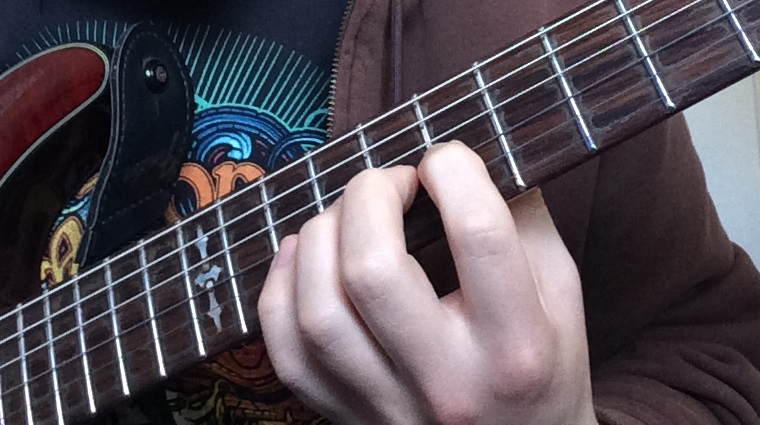
Playing Your First Guitar Bend
Play the 9th fret. Keeping your fingertips firmly in contact with the string and fretboard, move your whole hand up to bend the string.
Your first knuckles should remain bent at the same angle the whole time. Don’t try to bend by flattening the knuckles and pushing up with your fingertips – keep the fingertips locked in position and bend with the strength of your hand.
While bending, you can pivot your wrist so the pinky side of your hand comes closer to the neck of your guitar. This can let you push a little further and more easily.
Once you hear that 10th-fret pitch, stop bending.
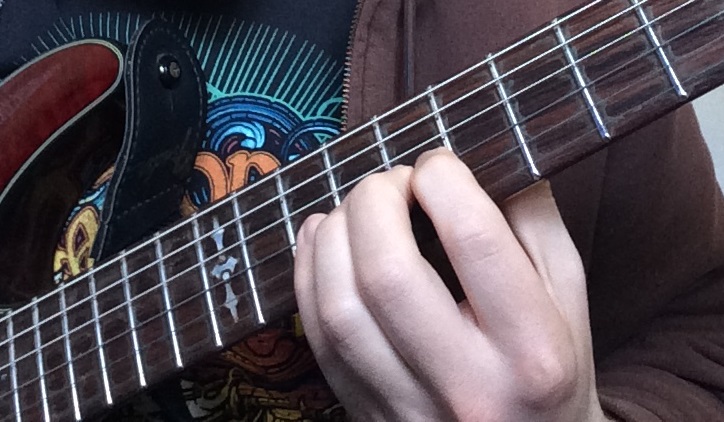
Releasing the Bend
Release the bend by continuing to push down on the string as you slide it back down to its natural position. Don’t just pull your fingers away or you may accidentally play a pull-off.
The string should continue ringing as you release it, and you’ll get a sound like your initial bend played in reverse.
Most of the time, you won’t want to hear that reverse bend. You can release the bend silently by bringing the palm of your strumming hand down on the string first. Try learning how to palm mute if this movement doesn’t come to you naturally yet.
You can repeat the process outlined above with any bend you want to do. Find the note you’re supposed to start on, then memorize the difference in pitch between that and the target note (or break out the tuner again). Then bend until you hit that note.
Special Bends
You may occasionally run into some really weird bends.
If you need to bend one of the thickest strings, then pushing it up might shove it right off the top of the fretboard. Simply pull the string down rather than pushing it up to play a bend.
If you see a bend on an open string or a ‘pre-nut bend’, you can play it by pushing down on the string behind the nut.
Please note that I’m just keeping my other fingers out of the way so you can see what I’m doing clearly – not to demonstrate proper technique! Always keep your fingers close to the strings and ready for action.
Many guitarists actually use their strumming hand to play pre-nut bends (after plucking the string first). This is especially useful for playing pre-nut bends on fretted notes rather than an open string.
What Does a Guitar Bend Look Like in a Tab?
Typically, a half bend is marked with a ‘b’. A full bend (one that raises the pitch by a major second) is usually marked with an ‘fb’.
Some tabbers will simply put in a ‘^’ and let you figure out how far you have to raise the pitch. It’s therefore very important to train your ear to recognize the intervals used in bends.
‘… train your ear to recognize the intervals used in bends. … Once again, ear training is very important for playing bends well!’
If the tabber leaves instructions to release the bend, then they mean to make the release audible. This is typically marked by the letter ‘r’.
So, if you needed to bend the 9th fret so it sounded like the 11th fret and then release it audibly, it might look like any of the following:
|–9fbr–|
|–9^fbr–|
|–9^r–|
|–9^–|
… or any of a dozen other variations. It all depends on the tabber’s style and thoroughness. Once again, ear training is very important for playing bends well!
Final Notes
Playing a guitar bend is simple. Mastering the technique so you can arrive exactly on your target pitch every time takes a bit more effort. If you put in your practice time with it, though, it will pay off, allowing you to play more of your favourite songs, write better music, and improvise more fluidly.
Questions? Additional tips for new guitarists? Let us know in the comments!
About the Author
Justin Golschneider is the Guitar Coach sub-editor. Before chopping off his hair and becoming a professional editor and writer, he played bass in the hardcore band Fractures and lead guitar in the short-lived melodeath band Steel and Crow. He lives in Burlington, Vermont.
Download Your FREE Tab Book Now
Master 42 all-time Classic Guitar Riffs. Includes free video lessons.